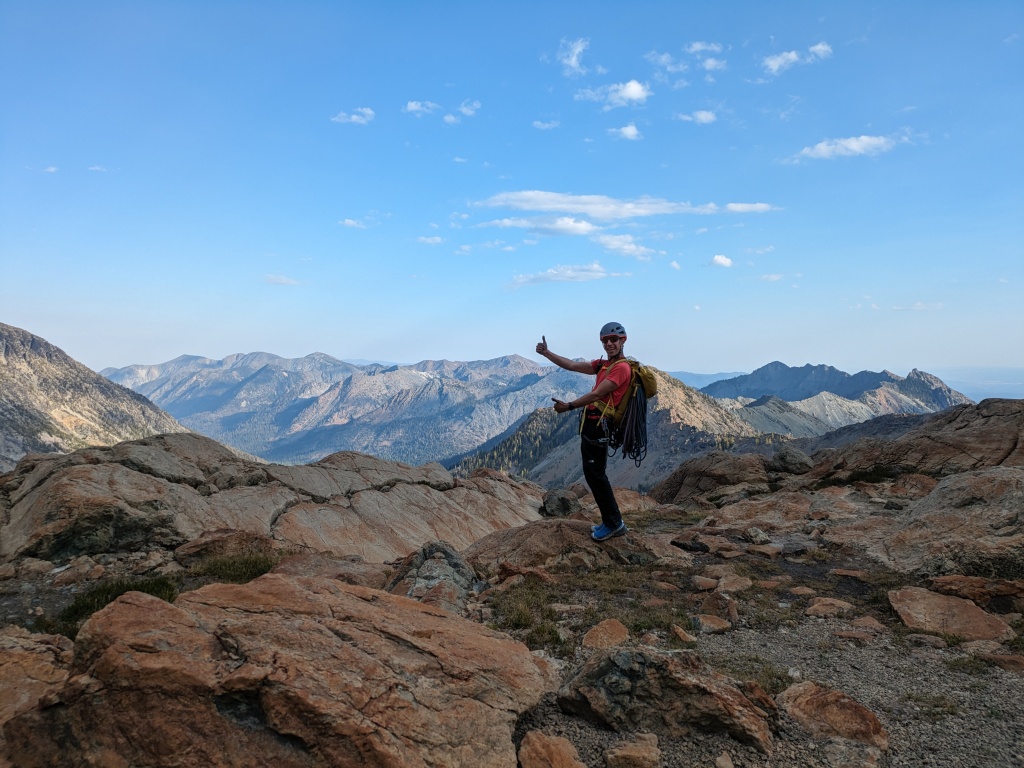
Climbing the east ridge of Ingalls Peak, WA
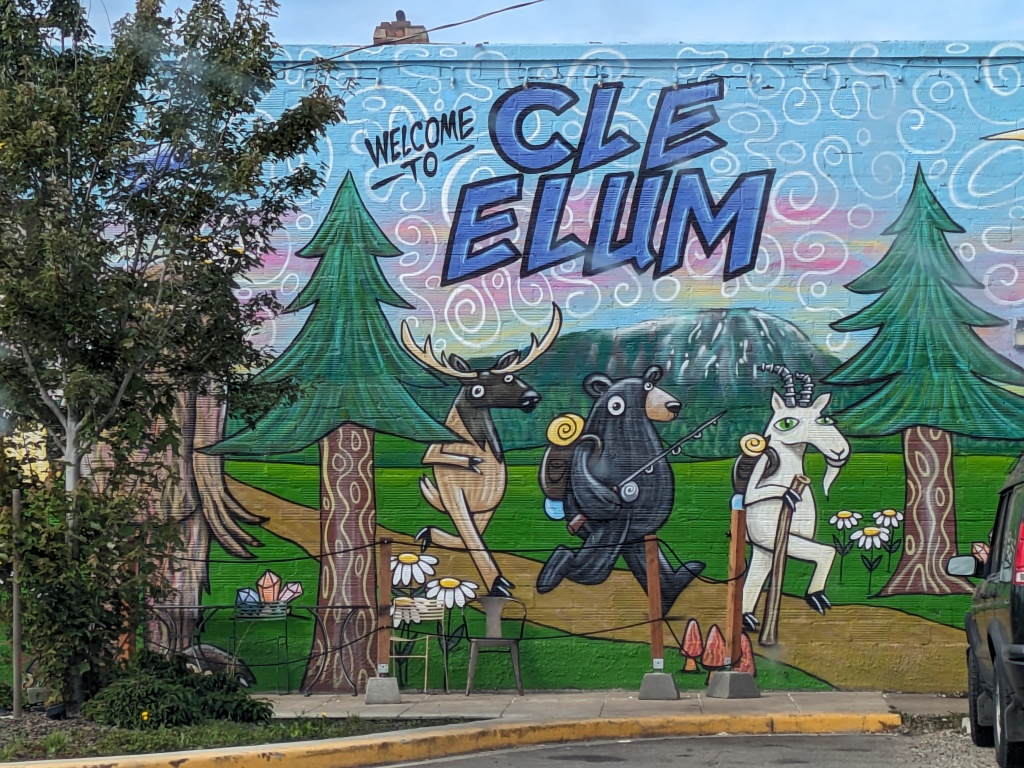
As fall began to roll into the pacific northwest, we fled south! Okay, really not that far south. We found ourselves in Cle Elum (no, we don’t know how to say it either), Washington. Cle Elum is actually a cute little town with a few nice tourist stops just south of the Alpine Lakes Wilderness, about one hour southwest of Leavenworth. While we found a number of great food stops in town (the bakery, and Owen’s Meats for AMAZING smoked pork chops), the main draw for us was access to the Alpine Lakes park, namely Ingalls Lake. Ingalls Lake lies just south of the famous Enchantments park. If you’re not familiar with the Enchantments, it’s an ultra-famous backcountry region outside of Leavenworth with a notoriously tricky permit system (with only about a 2% success rate of winning the permit lottery for the core area!). For those of us who don’t plan ahead, a backpacking trip to Ingalls Lake seemed like a sneaky way to get into the area without having to fight a permit system, as no reservations are required for Ingalls! Simply fill out a wilderness permit at the trailhead, pay a $5 USD access fee (or free with a Northwest Forest Pass or America the Beautiful Pass), and you’re good to go.
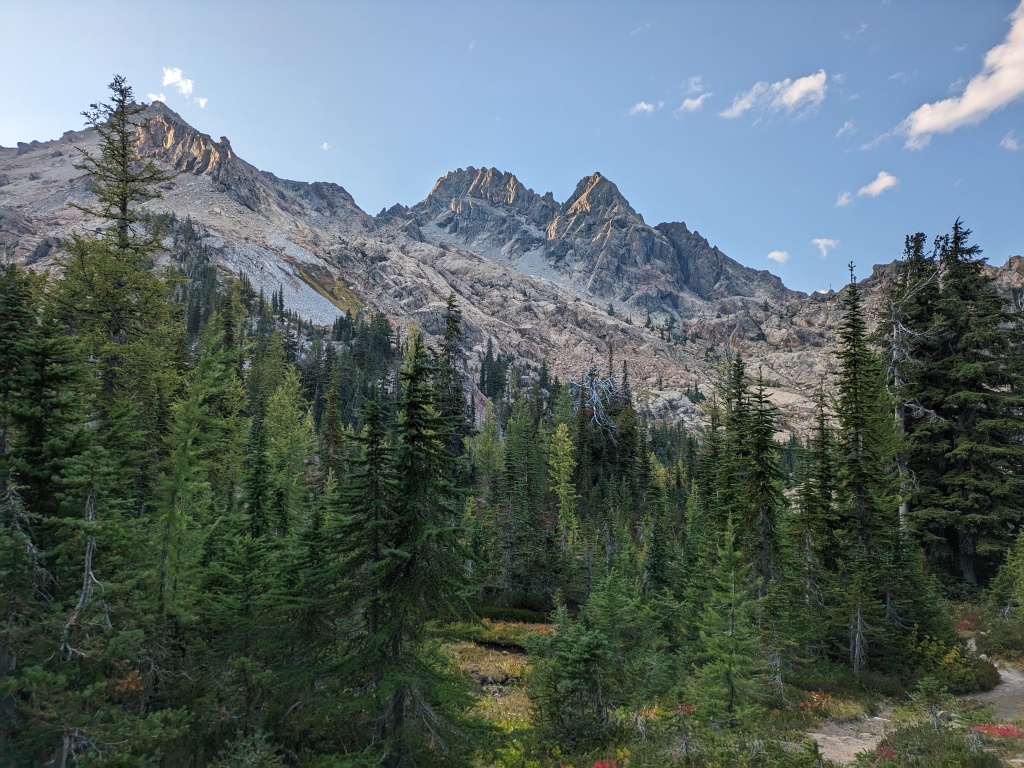
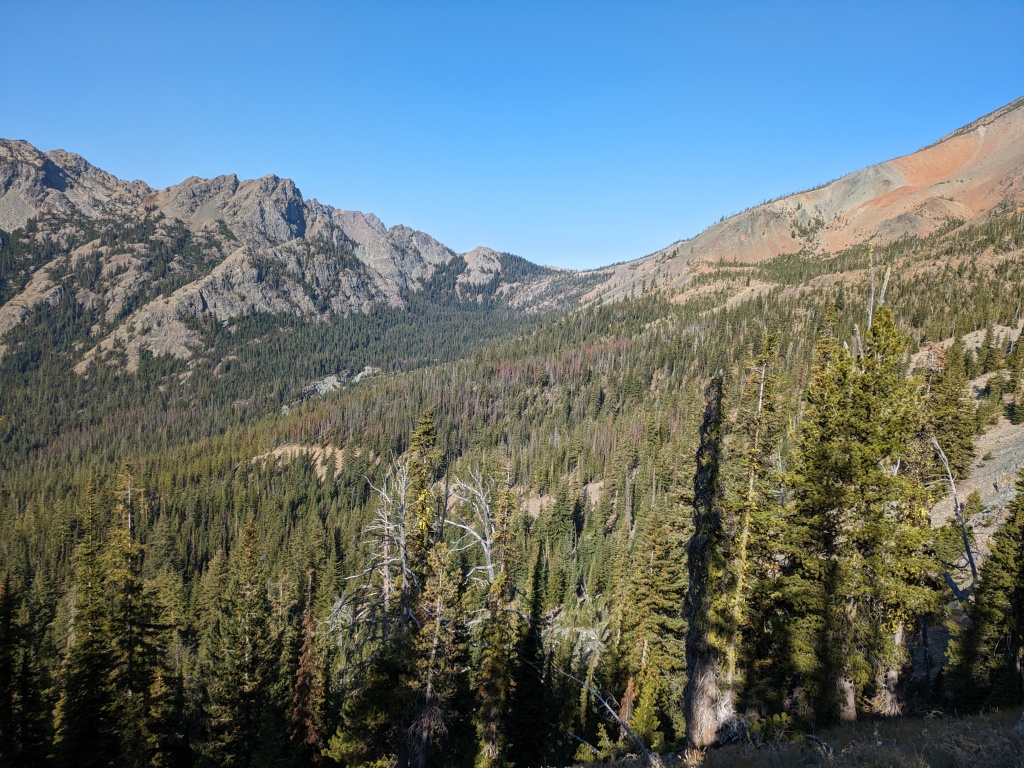
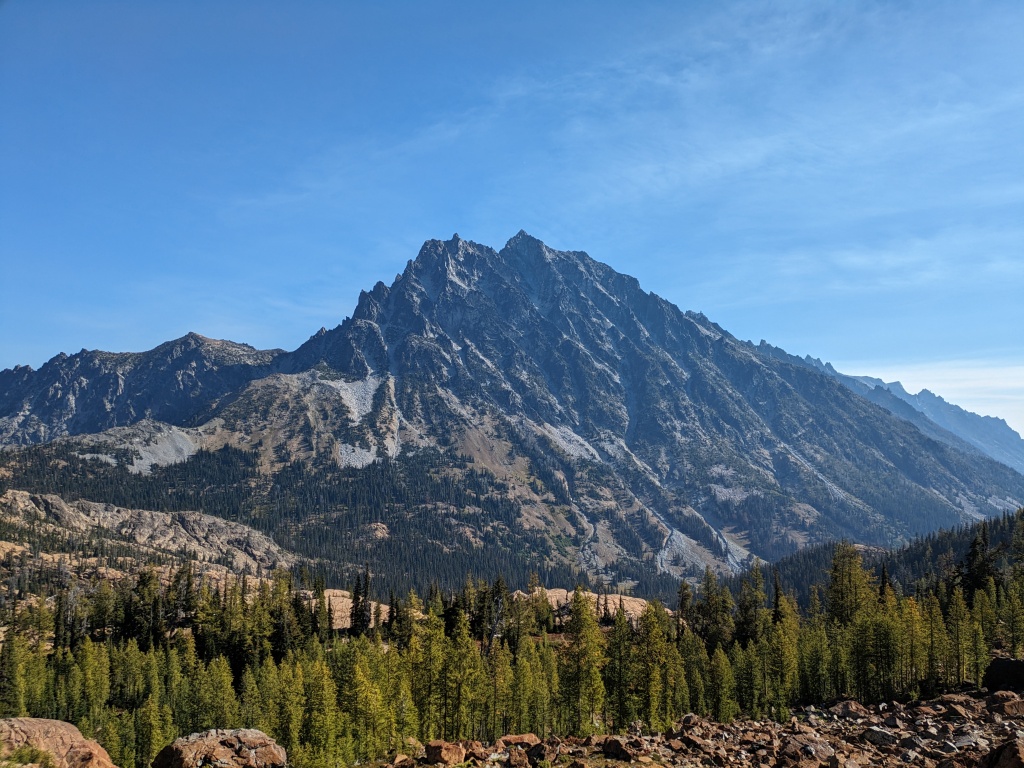
After a long drive over the border, we started our trip by camping at one of the many free (with WA Discovery pass) campsites along the FSR leading to the Ingalls trailhead. After a quiet night, we quickly packed up early in the morning and drove the remaining 30 minutes to the parking lot. The road is gravel, but in very good condition – our low clearance 2WD car made it just fine. The weekend was forecasted to be hot and sunny, and so, unsurprisingly, the parking lot was already very full at about 8 am when we rolled in. Shouldering our bags, we hit the road. The trail to Ingalls is one of those amazing trails that rewards you with views nearly the whole way. The path is open, and ascends gently to a pass, then follows a ridge system to the lake. We hiked in mid-September, and were treated to all sorts of fall colours as we hiked: red, orange, and yellow leaves on the hillsides, and yellow-green larches just starting to turn in the alpine.
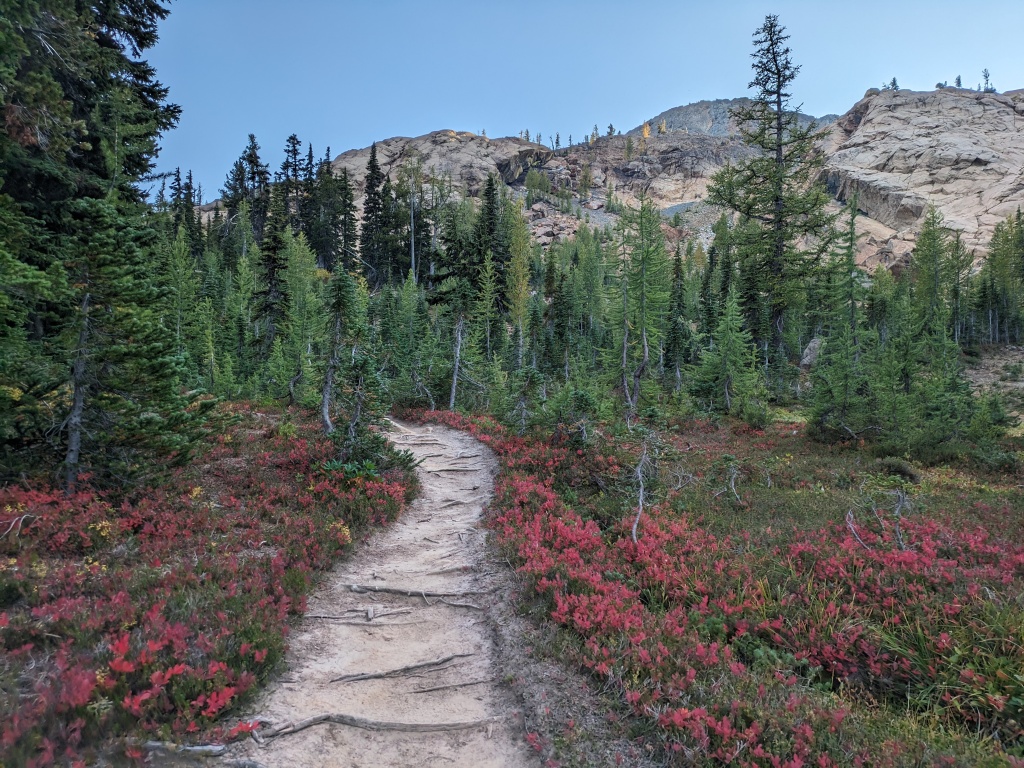
Once you climb up into the pass, the trail splits into two: an upper trail, and a lower trail. Both options have prime locations for camping, but the more formal camping spots seemed to be on the lower trail (ie: signs pointed us that way). The most popular camping spot seems to Headlight Basin, near the end of the lower trail. Note that there is no camping directly at Ingalls Lake itself. You must hike 10-25 minutes from your campsite to visit the lake, depending on how far away you camp. We chose to take the upper trail, and found a nice campsite midway down, marked by a clearing on one side across from some meadows. All campsites seemed to be close enough to running water. A pit toilet was located a few minutes away, and the site had nice views of Ingalls and Mt Stuart and a couple good trees for hanging food (there are no bear caches up here, so bring a bear bin or bag, or be prepared to hang). All camping spots are first-come-first-served, with no tent pads, but we found lots of spaces to set up a tent, even on a busy fall weekend.
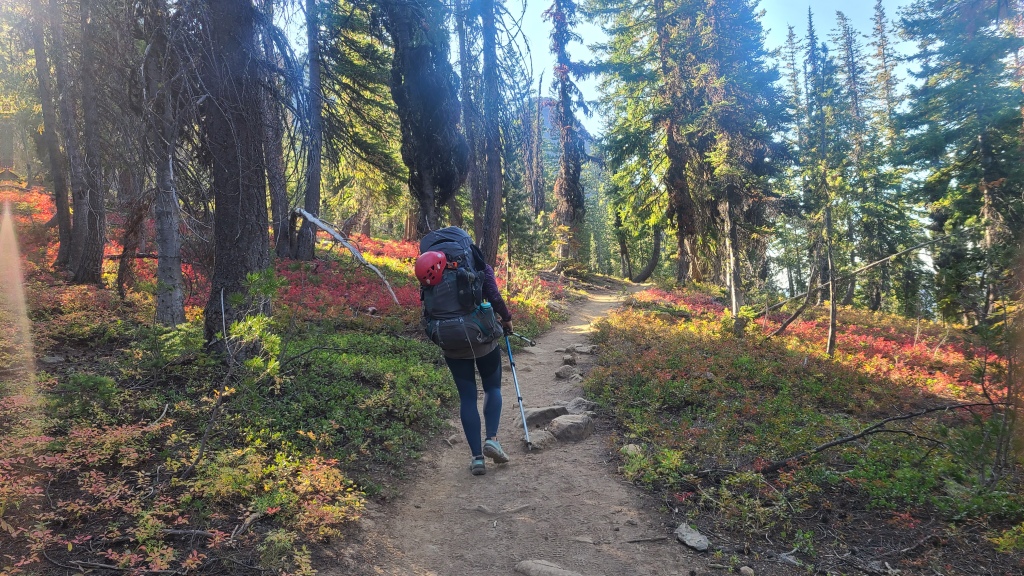
The hike from the parking lot to our camping spot took us just under 2 hours. After setting up camp and eating a quick lunch, we were on the road again towards Ingalls Lake for our main objective of the trip: climbing the east ridge of Ingalls Peak.
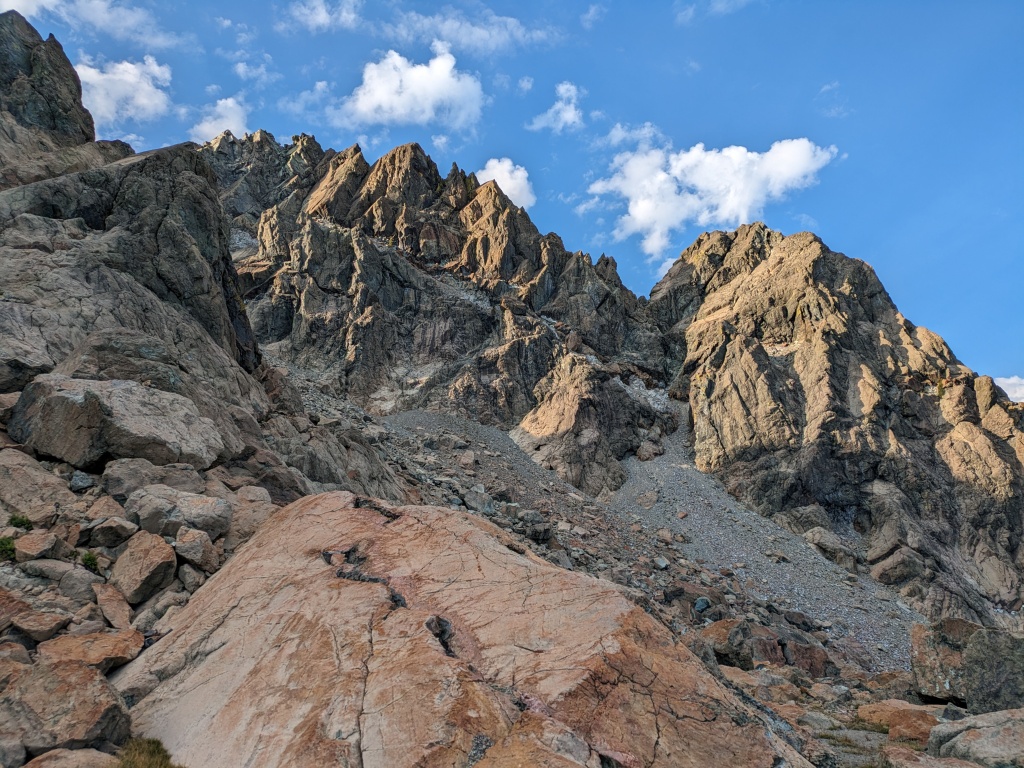
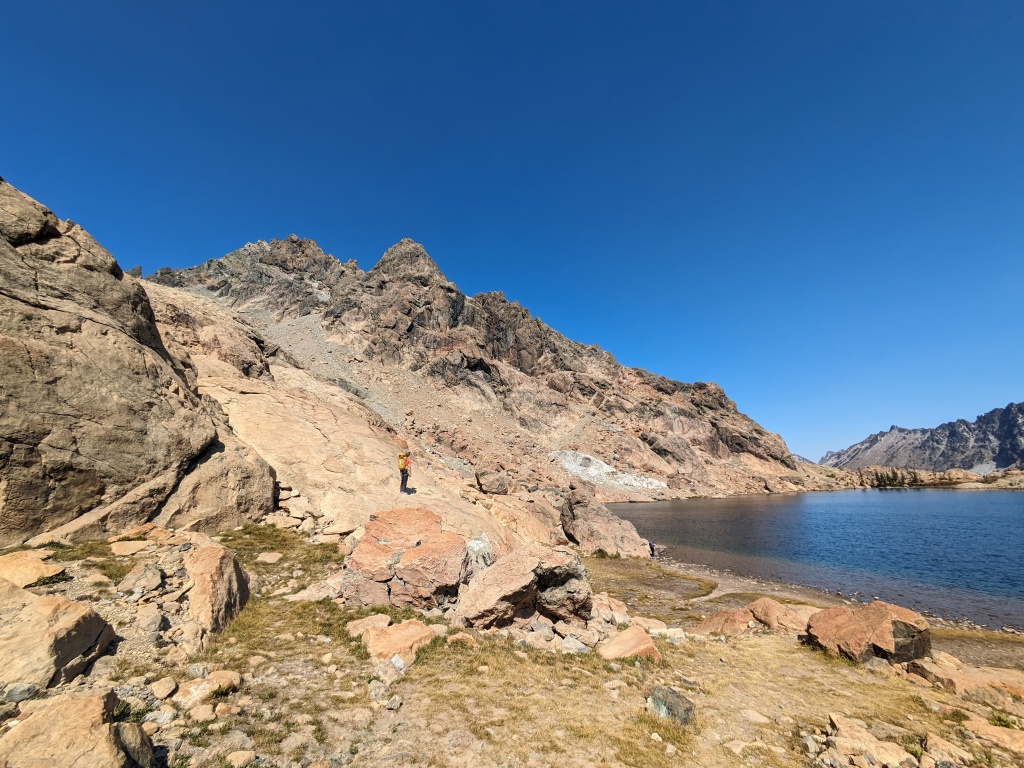
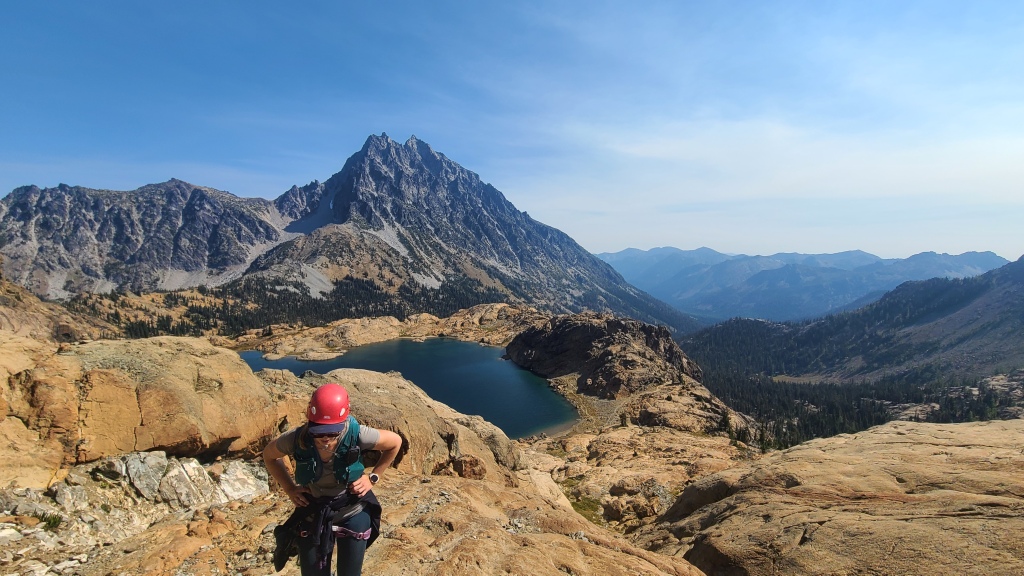
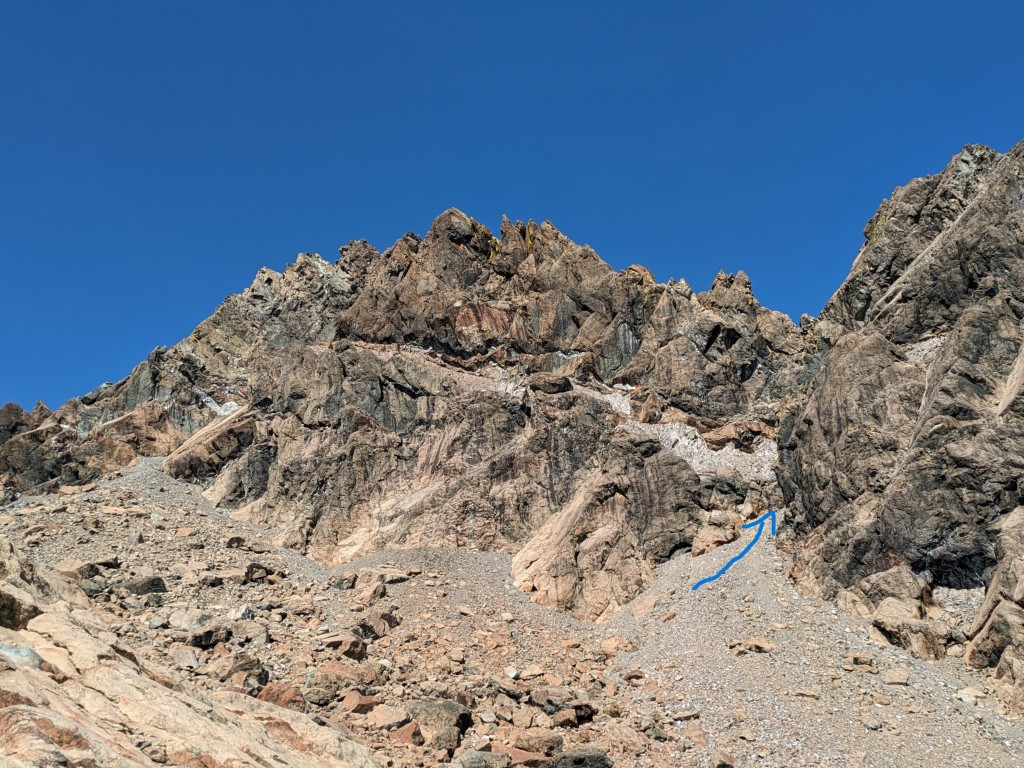
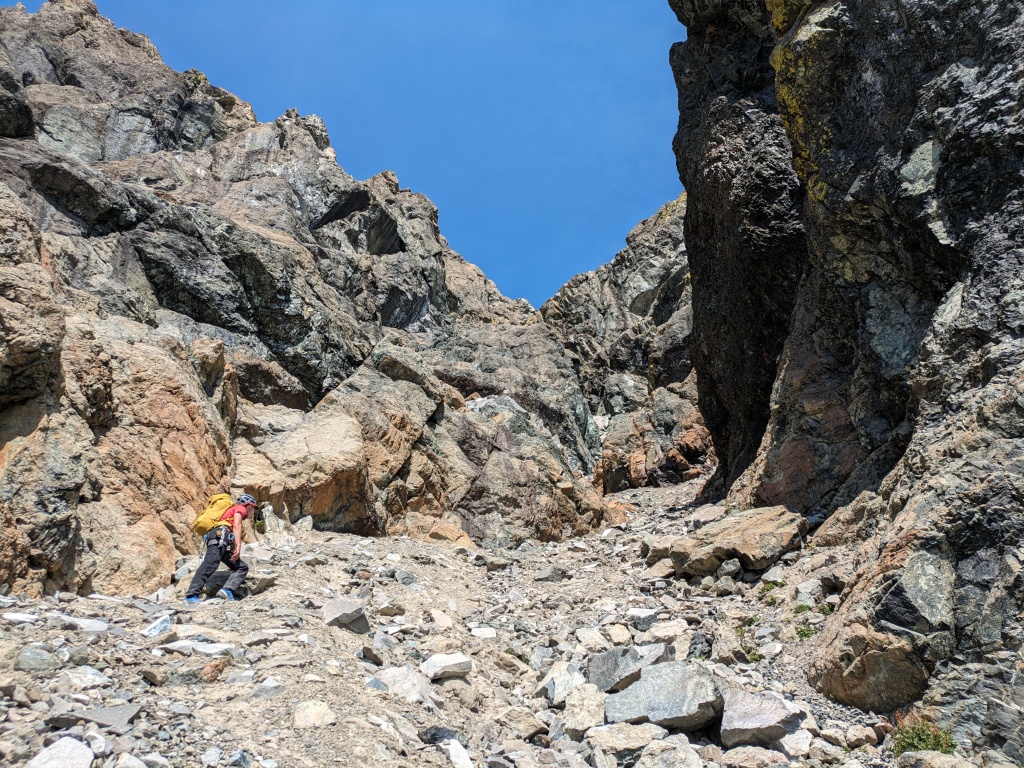
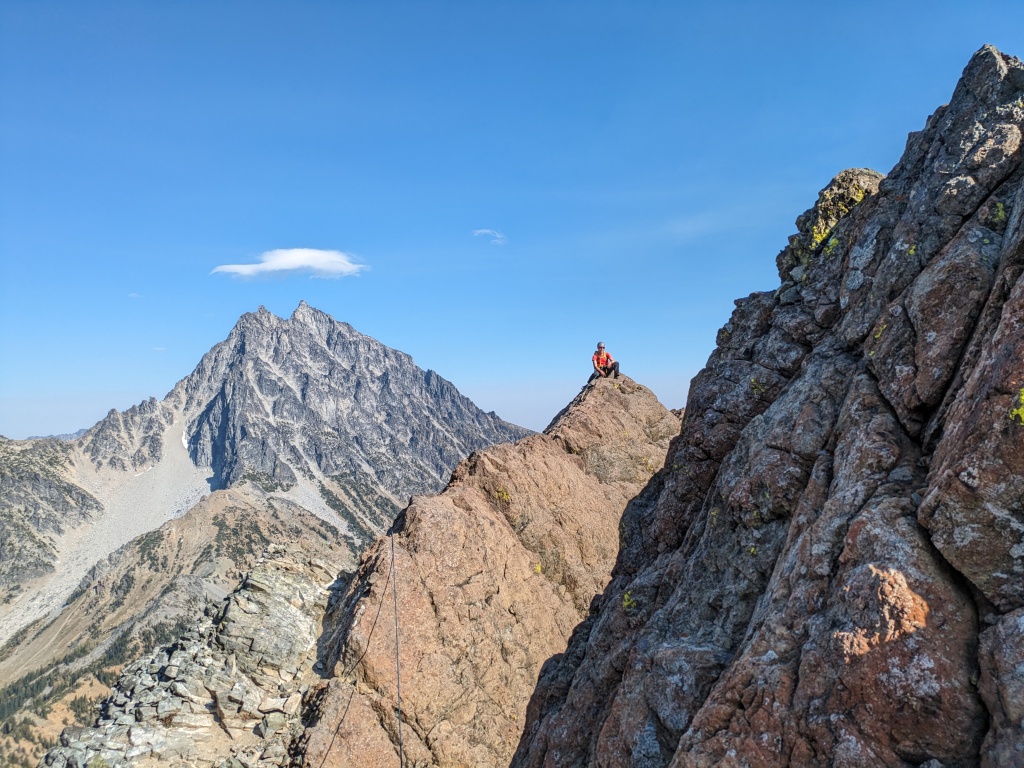
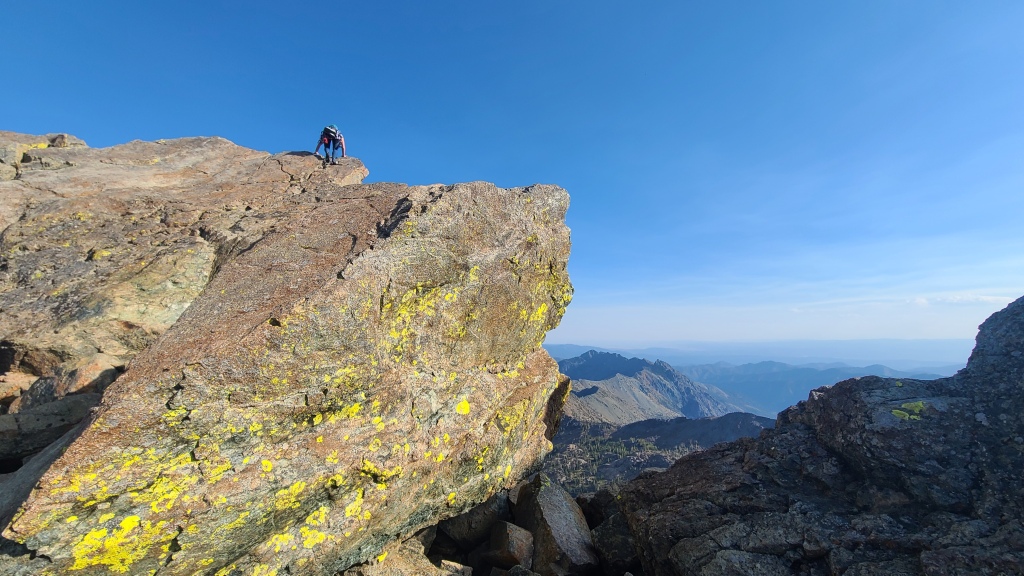
We made short work of the remaining hiking trail, arriving quickly at Ingalls Lake for a few photos. From the edge of the lake, we took a hard left up gentle slabs, making directly for Ingalls Peak itself. We made for the obvious gully (check out the description and comments on Mountain Project for a detailed route description), following a faint footpath once in a while, as well as a few cairns. Once in the gully (completely snow-free in mid-September), we carefully hiked up about midway, moving slowly to not dislodge the many, many loose rocks. About half-way up, the rock is marked by a white-grey dyke (a band of different rock running nearly horizontal across the gully). Some fourth-class scrambling starts here. We curved around hard climber’s left, then up, then back right, to get in front of the dyke and the base of an easy-looking scramble line, but it seemed like you could also potentially just keep climbing straight up the gully directly until you hit the dyke, as there’s a nice gravel ramp to walk up. From here, we scrambled the fourth class terrain until about 15 meters below the ridge, as the terrain starts to get steeper. Our first pitch consisted of a short, vertical scramble (stay on the left of the chockstone), a spicy and slabby crux move to gain the ridge, then a quick section of down-slopping blocky slab (with a piton in the middle of the wall) to end at long flat, completely horizontal section below a big wall with a couple spots for gear.
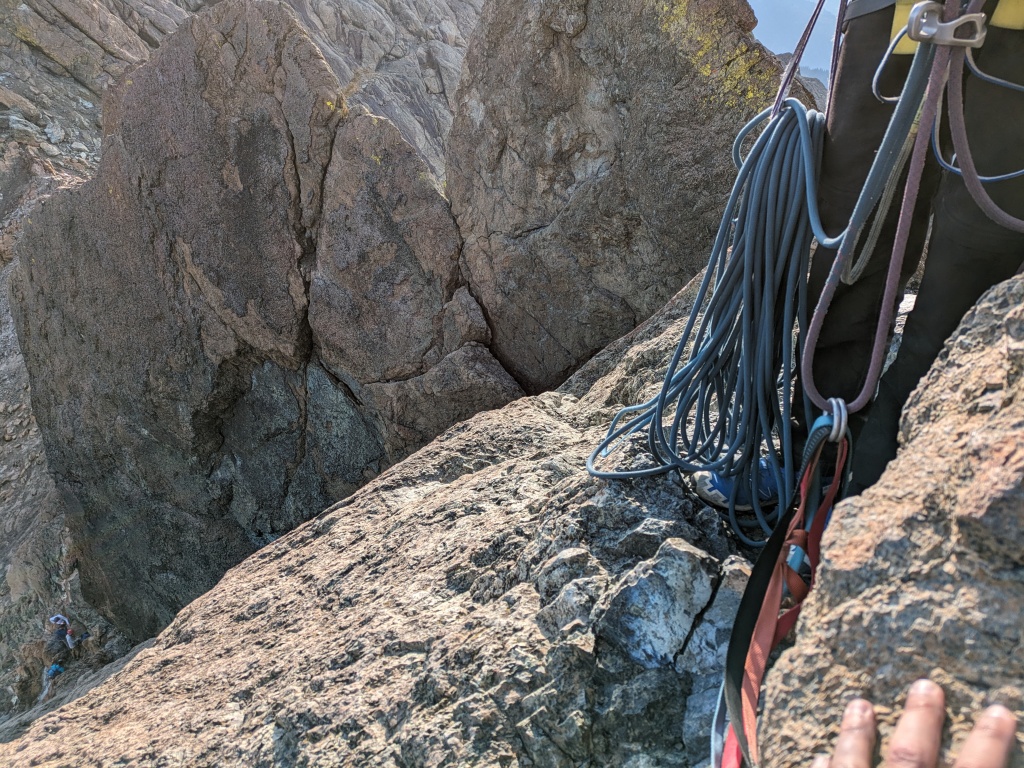
Our second pitch was very short. It consisted of a very sketchy downclimb on a very thin and exposed ridge. I recall exclaiming “this is f*cking messed up!” in minor terror several times as I led it, but in retrospect, all the holds needed were there. I set up an anchor a little up the ridge on the other side to watch Chris follow and yell beta.
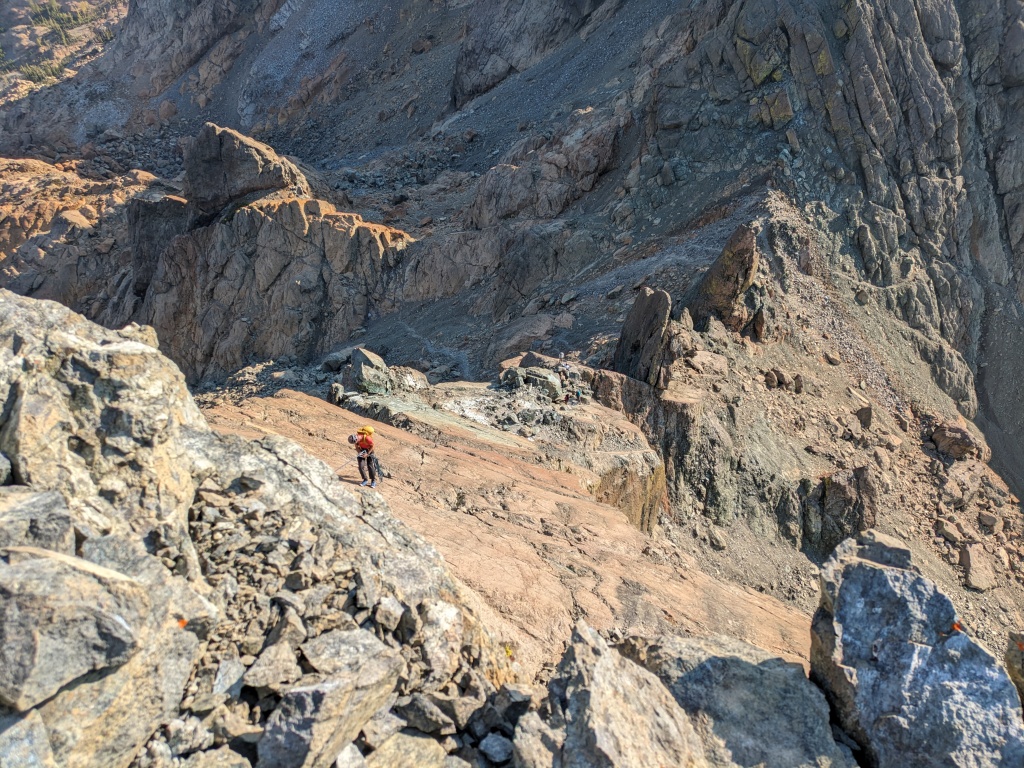
The remaining pitches more-or-less followed the MP description and route/ridge topos available there. Route finding was little harder than I expected for a ridge climb (perhaps because the main description on MP is a little poor – don’t take it too seriously). The highlight of the climb for me was an insane au cheval portion in the middle. It’s a sheer, knife-edge arete with extreme exposure on either side, but it’s much easier than it looks, and very easy protect on both sides.
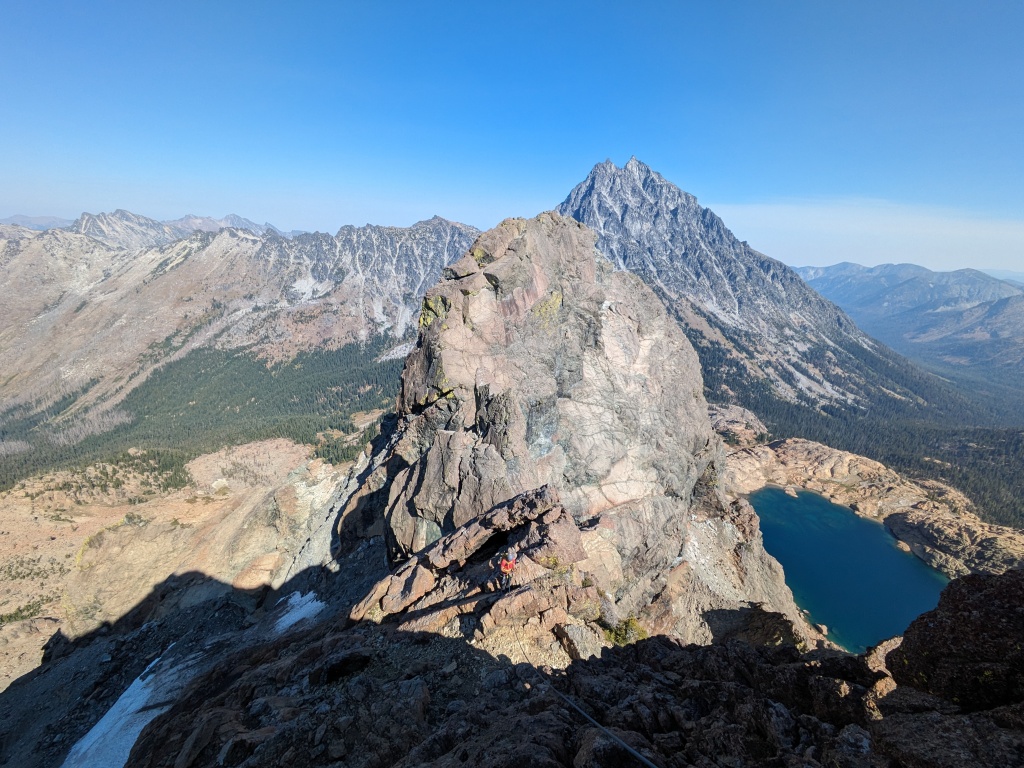
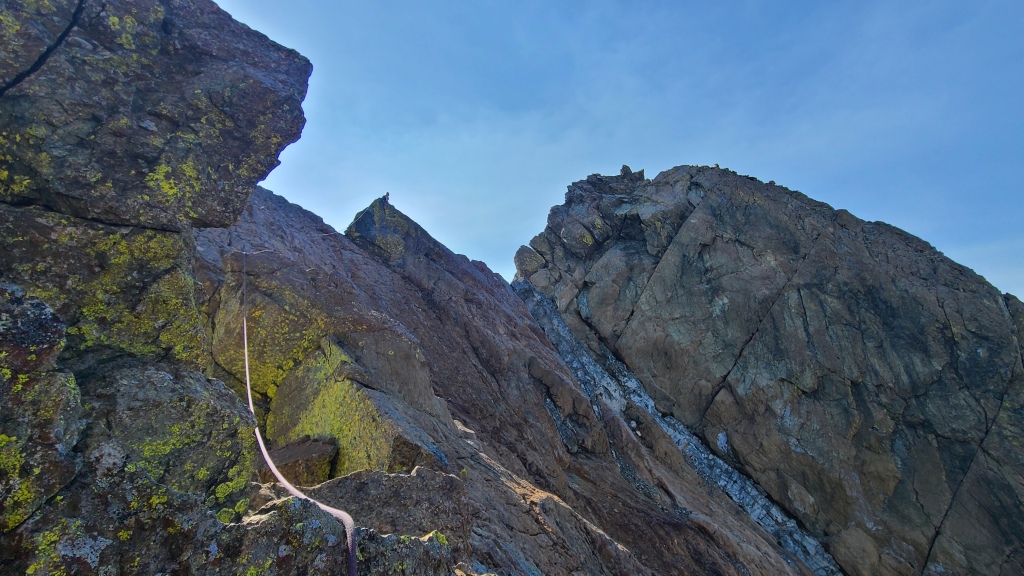
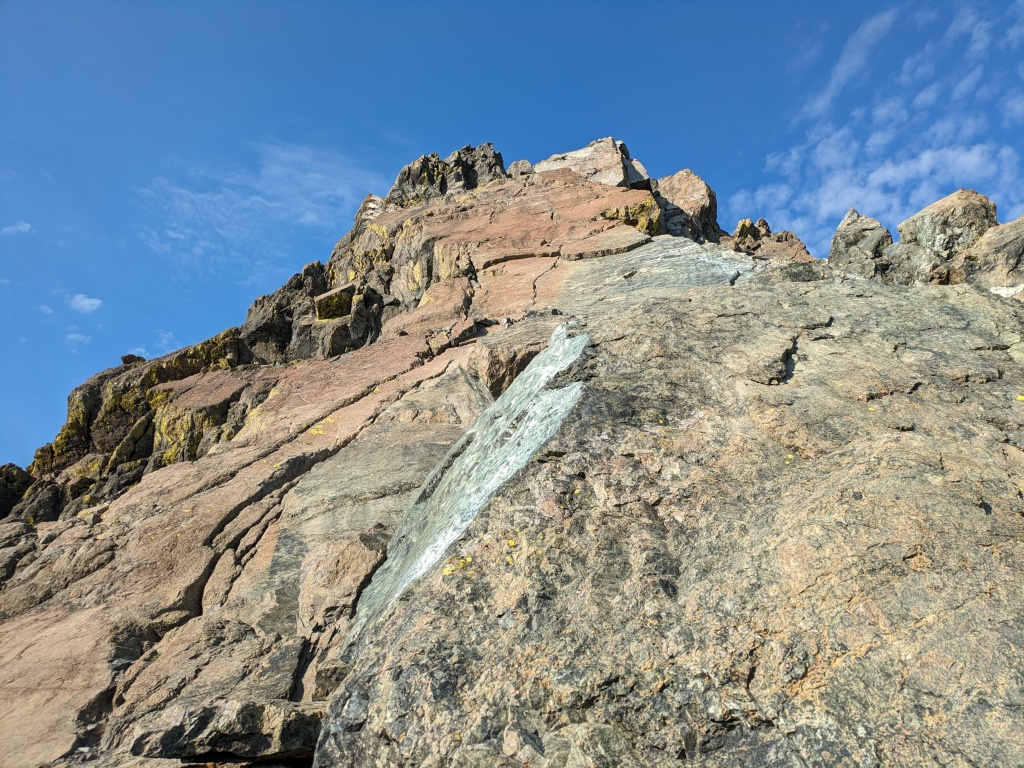
The technical crux of the route is the beginning of the final pitch, on the last vertical section before the summit. This is a short 5.7 sequence up an awkward corner with a fist crack. The given beta on MP is to climb the fist crack (although your pack won’t fit), but we both thought it was significantly easier to to use some sloping side-pulls to layback in order to get feet up and stem. From here, you’ll have access to way better hands for both right and left. The crux protects low with a BD #3, or mid-way with a #4 if you want to lug it up. There’s also a great spot once you’re on top of the ridge above it for a cam (#1). From the top of the crux, there’s an easy up-and-down traverse across a couple minor bumps to the true summit.
Chris and I have done a lot of alpine climbing, but this felt like the most alpine-y climb I’ve ever done (outside of the Tantalus range). Out of 6 pitches, I only made one gear anchor. Otherwise, wrapping horns and slinging boulders was standard practice. The climb itself is mostly a ridge with a few short vertical sections and lots of gendarmes. As such, it’s mostly easy climbing with a handful of short cruxy sections (namely, above the chockstone on P1, the downclimb on P2, and the 5.7 fist crack on P6). I used trail runners for the approach and descent and rock shoes for the climb, but Chris did the entire thing in trail runners (although it made a few of the cruxes a bit tricky). I brought a light alpine rack (singles to BD #3, with lots of long draws and cord). I also brought a set of nuts, but wouldn’t do so again, as the route was too wandering and the cracks too wobbly for me to trust that any nuts would stay put.
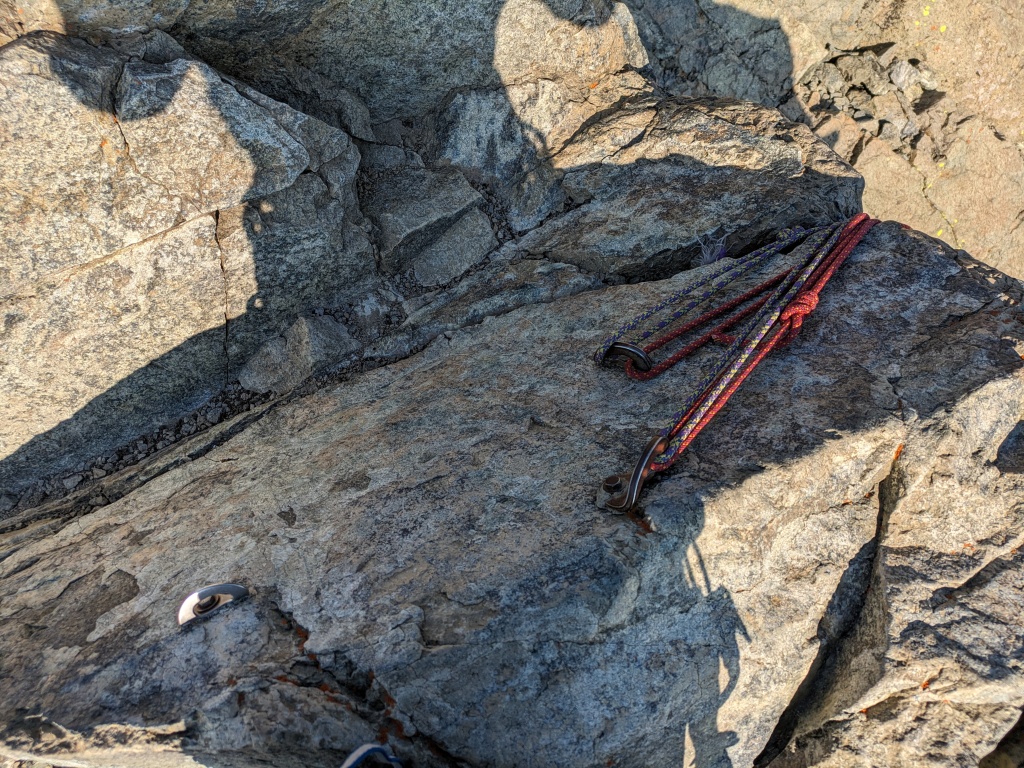
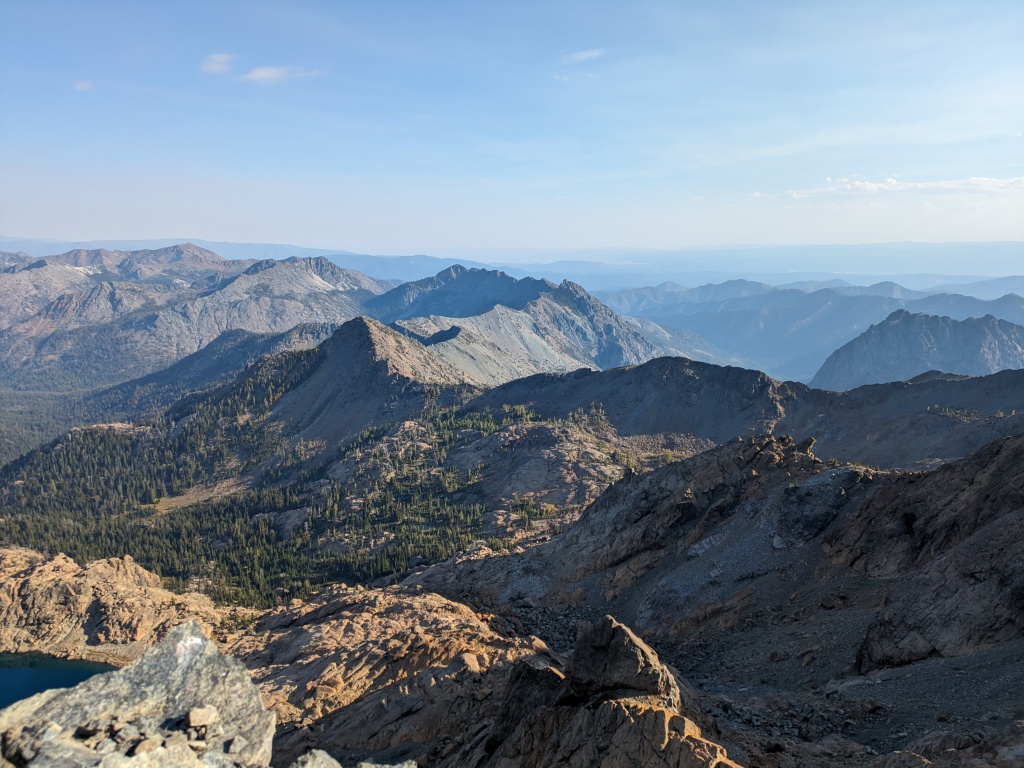
The descent from the top of Ingalls is 3-4 straightforward rappels down the south ridge (you actually descend via the South Ridge climbing route, 5.4). From the summit, keep walking to the south and down a bit, and you’ll find three bolts on the ground right at the end of the terrain, likely with some tat already attached (although tat comes and goes, of course). Inspect, and rap from here. You’ll head down the sheer, positive-sloped wall below. Midway down this wall (maybe about 20-25 meters), is a second set of bolts and tat (you’ll likely be able to see it from above at the first station). From this station, a full 35-meter rappel takes you to a rocky ledge system on which you can walk/scramble. A single 70-meter rope is recommended for this descent, although you can make a 60 m work – it just involves some slightly sketchy downclimbing in a crack for the last section. People do it, but it doesn’t look super fun to me. The next rappel is short and optional: you can rap the loose, rocky ledges to the base where there’s a large boulder slung with tat, or you can just scramble down, since it’s almost a walk. It’s only about 10 meters, so we just downclimbed to save the trouble and rope-rock flailing. From the boulder at the base of the gravelly ledges, a 35-meter rap takes you to the base. Again, a 60-meter rope would work, but you won’t nicely reach the ledge, and you’ll have to downclimb a bit. From here, pack up the rope, scramble down, and follow a footpath leading across some scree then up through a mini “pass”. Follow cairns and footpaths back in the general direction of the lake, then pick a gully and descend to hit the hiking trail again.

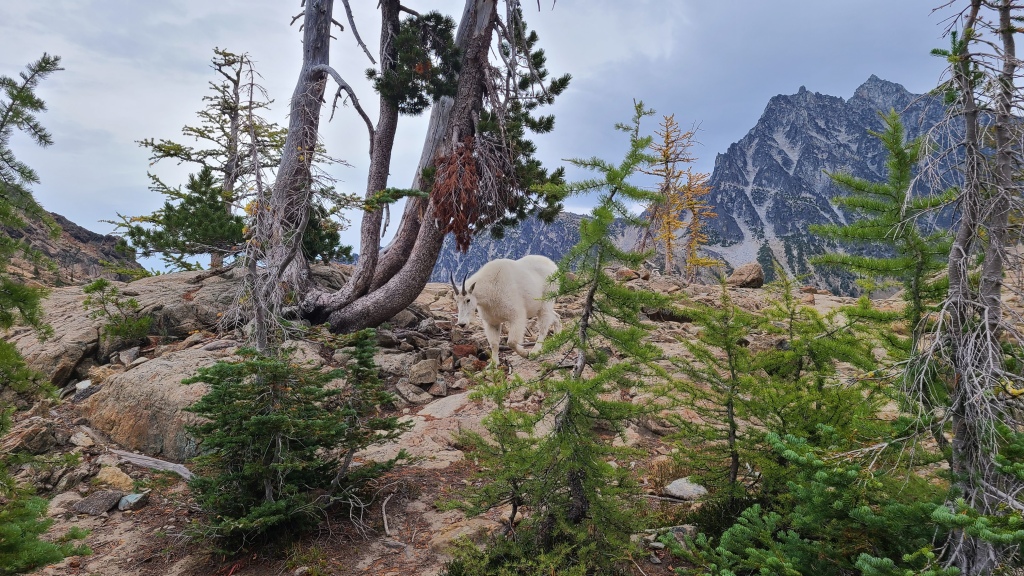
We arrived back at our camp about an hour before sunset. Our whole day, car to camp to climb to camp (plus a wrong turn onto the lower trail at the end of the day!) was about 8.5 hours, 15 km, and 1300 meters of elevation gain. The hike in was 2 hours, the approach from camp to the base of the climb was 1 hour, and the 6 pitches of climbing plus 3 rappels took 4 hours. The next morning consisted of a quick breakfast, a long hello with a friendly mountain goat, then a hike back to the car (about 1.5 hours). Overall, we really enjoyed our trip to the Alpine Lakes Wilderness. Fall is a beautiful time to visit, the east ridge of Ingalls was a lot of fun, and we both really appreciated the no-hassle, no-reservation-needed camping system. As an alternative to the uber-busy Enchantments, this was an A+.